Building chatbots
Creating a chatbot
Choose a starting point, complete the form and review it
Add new chatbot on the dashboard opens the create wizard. It asks how you want to start, then walks the same form a section at a time.
How do you want to start?
Step one is three cards. Whichever you pick, you are filling in one form and saving it once — nothing is created until the last step.
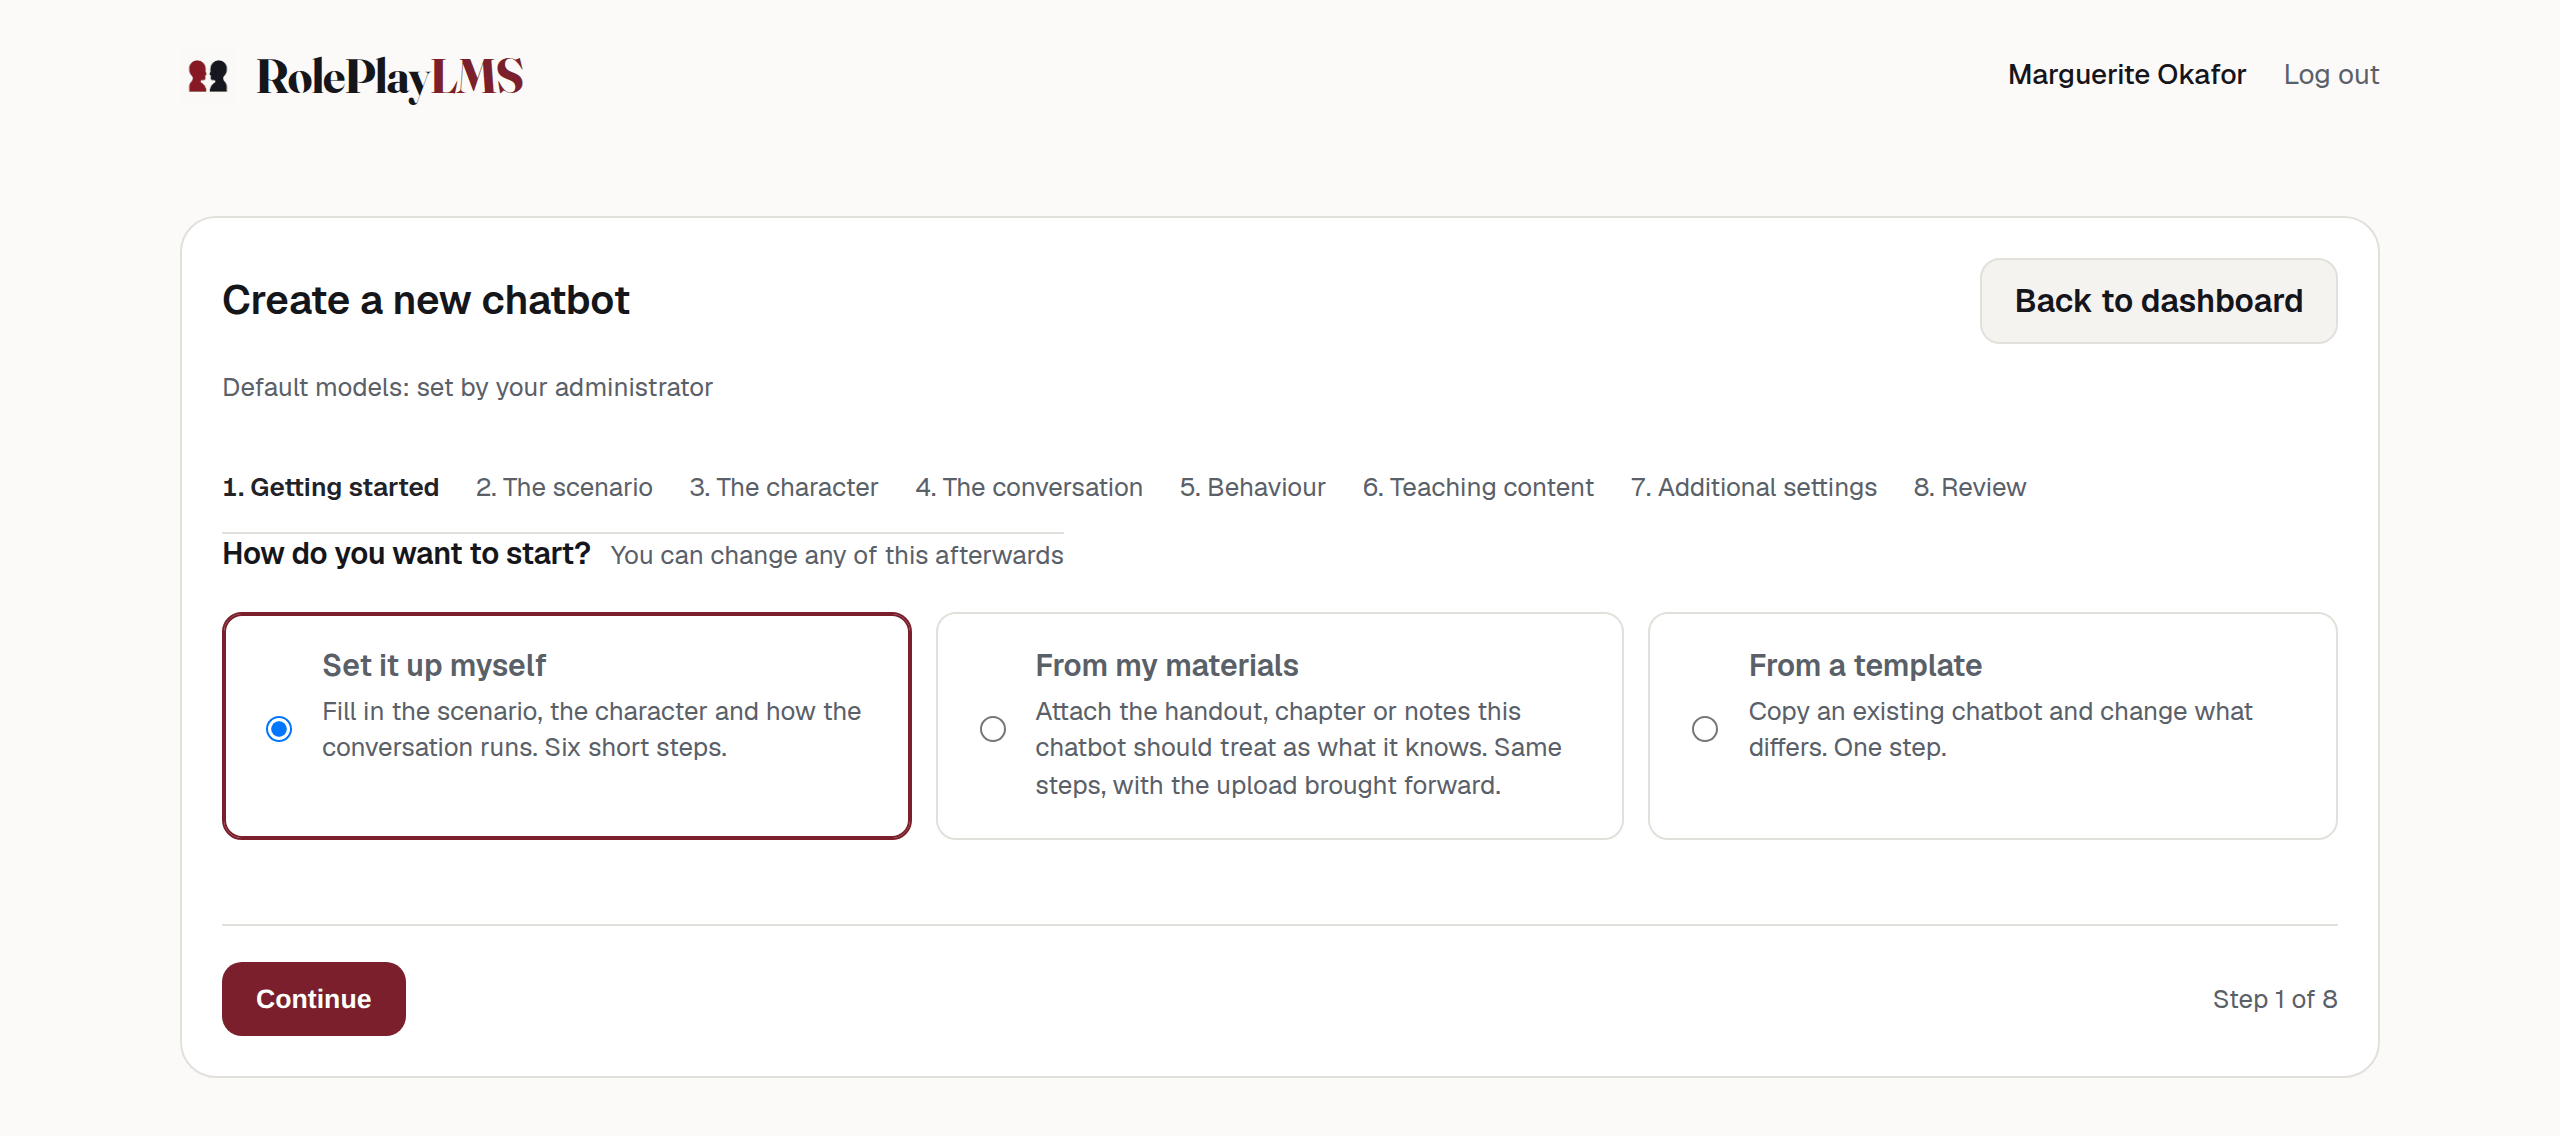
- The rail — eight steps, current one in bold.
- Set it up myself
- From my materials
- From a template
| Control | What it does | Who sees it |
|---|---|---|
| Set it up myself | Fill in the scenario, the character and how the conversation runs. Six short steps. | Everyone who can build |
| From my materials | The same steps, with the document upload moved to step 2. | Everyone who can build |
| From a template | Copy an existing chatbot and change what differs. One step. | Everyone who can build, once something is marked as a template — a personal account always has a few to start from |
If nothing in your organisation has been published as a template, the third card is greyed out and says so: Nothing is marked as a template yet. Tick “Available as a template” on a chatbot to reuse it here.
The eight steps
The rail shows eight steps: a starting choice, the six edit sections, and a review.
- Getting started — the three routes above.
- The scenario — unit code, title, and what the student is told. See The scenario.
- The character — how the chatbot looks and sounds. See The character.
- The conversation — how it opens and how it runs. See The conversation.
- Behaviour — the instructions the student never sees. See Behaviour and the role prompt.
- Teaching content — optional documents. See Teaching content.
- Additional settings — limits, memory, feedback, marking. See Additional settings.
- Review and create — a summary of the main choices and the button that creates the chatbot.
Continue and Back move between steps; neither saves anything. Only Create chatbot on the last step writes the chatbot.
Note
From my materials reorders the steps rather than removing any. Teaching content becomes step 2, and you still describe the character and the conversation afterwards.
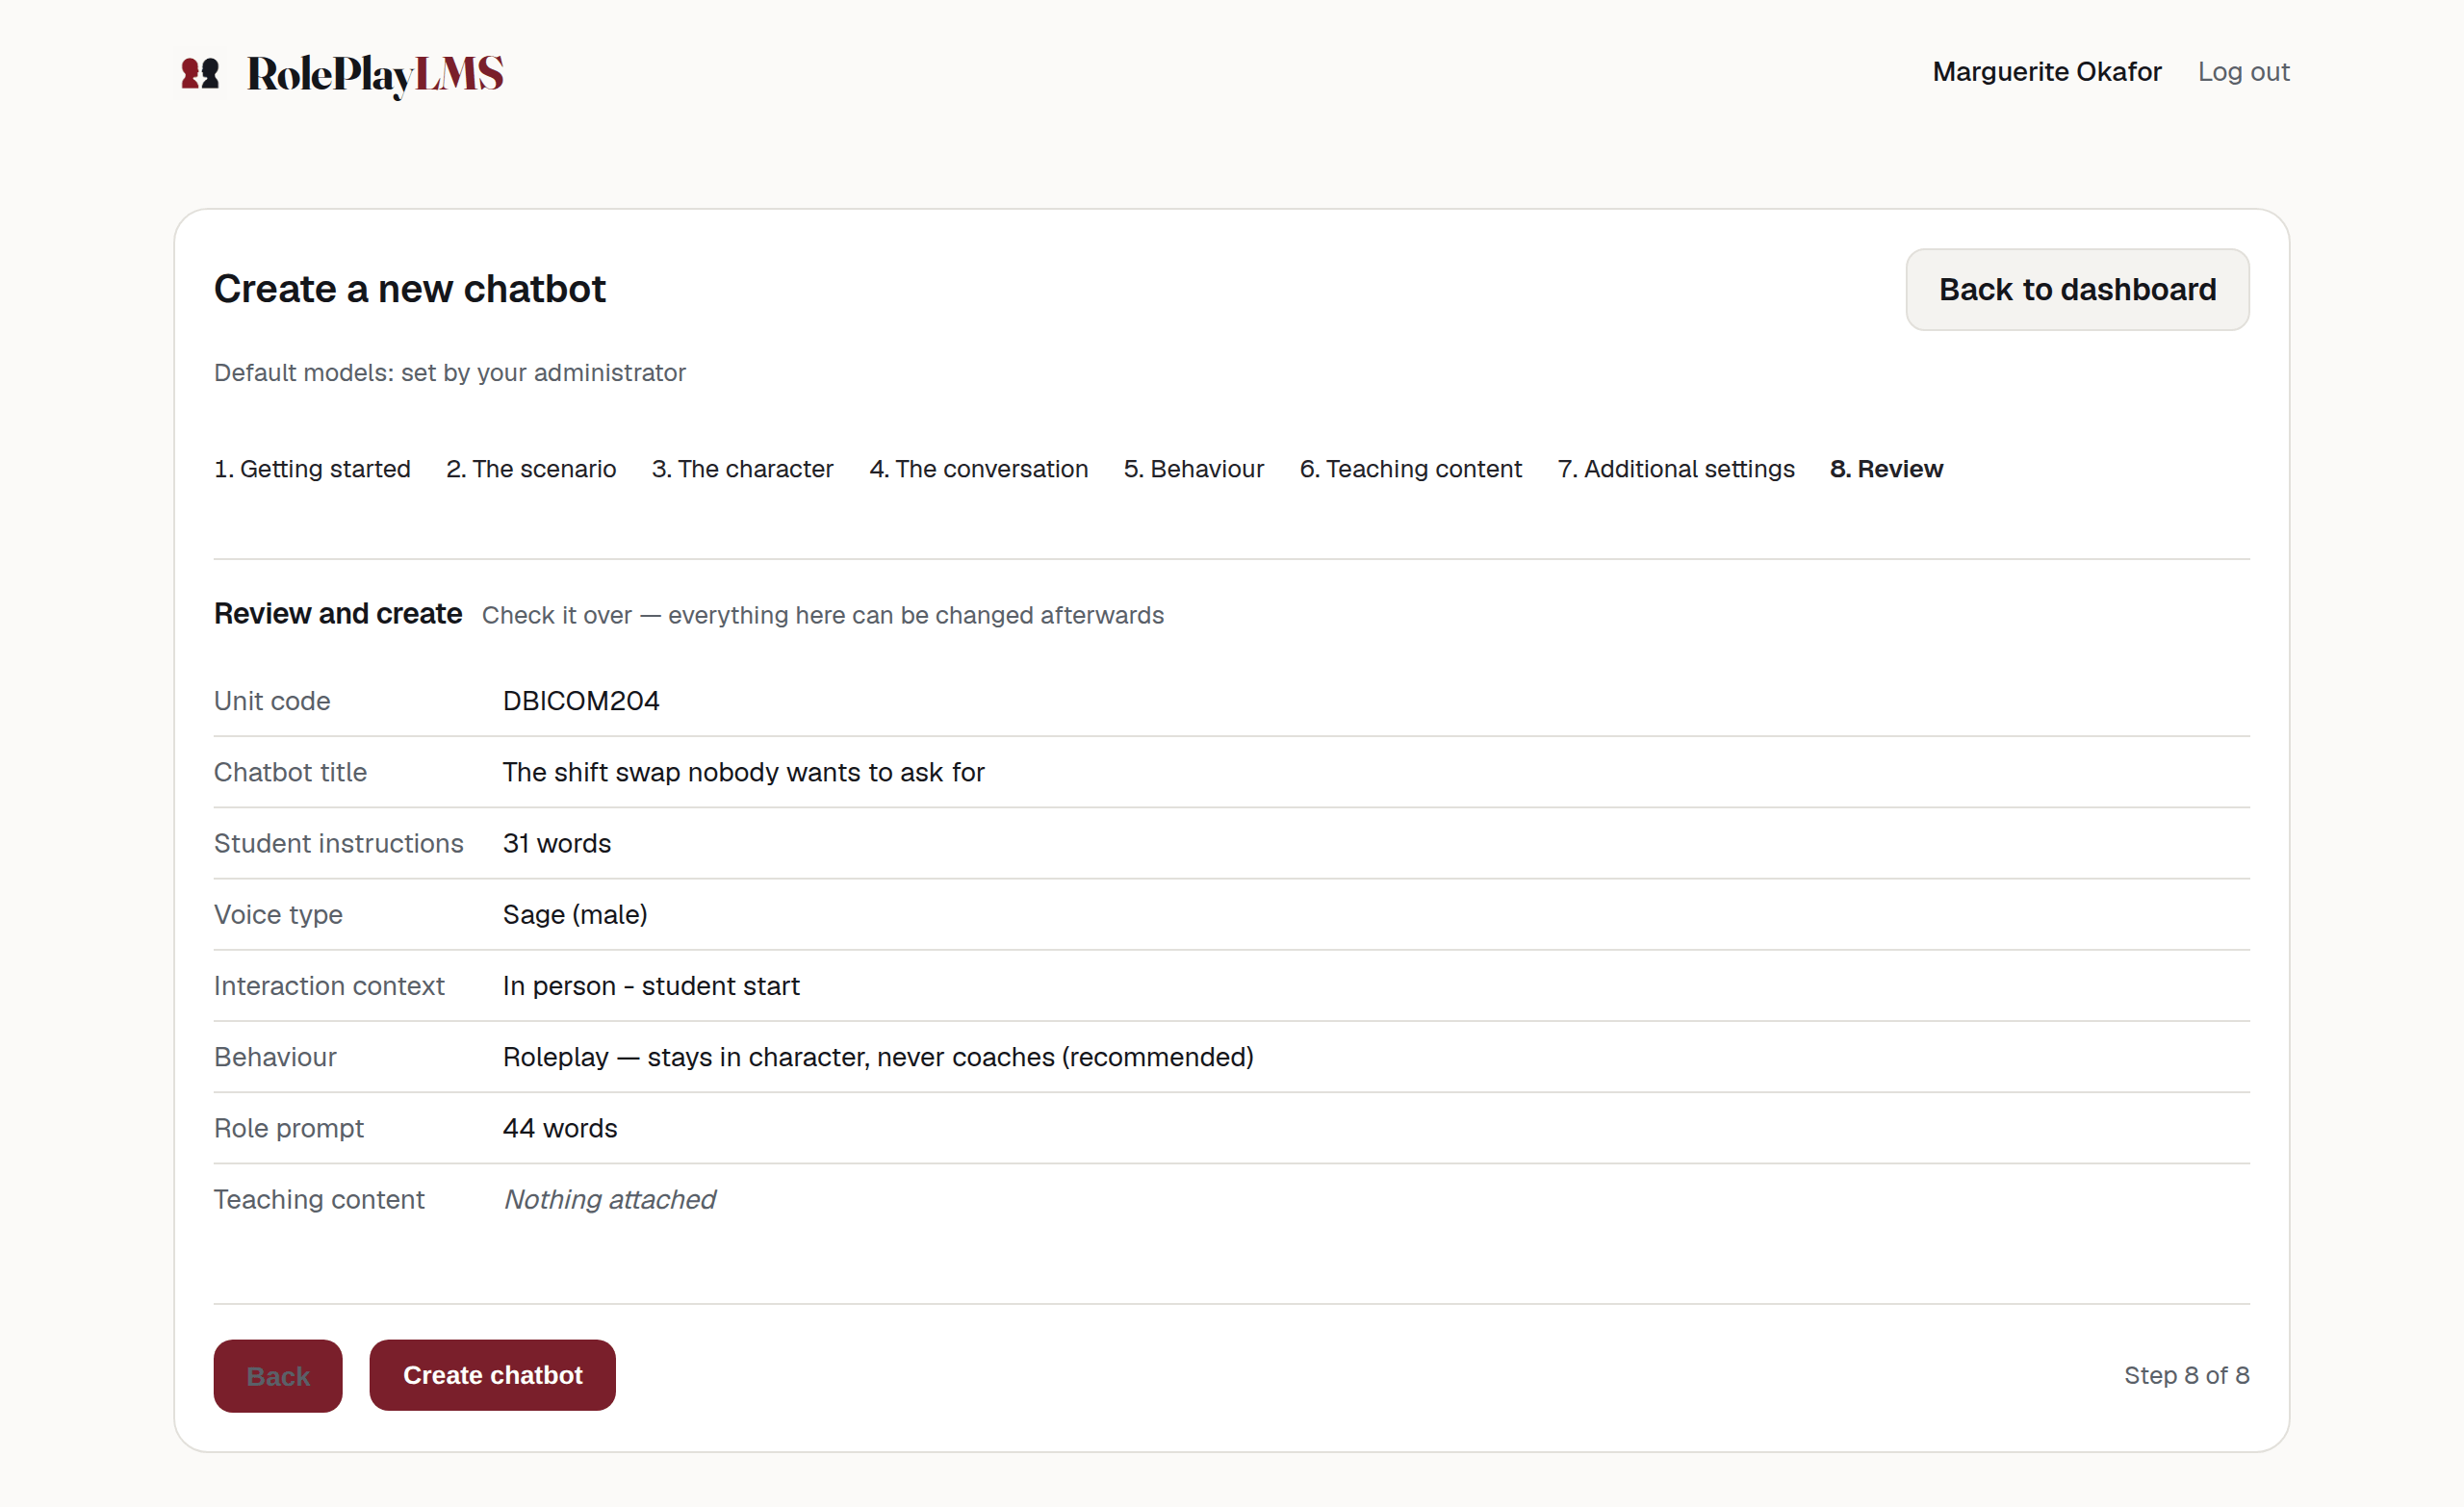
The review is a summary of the main choices, not a list of every setting. Check the behaviour mode, role, student instructions and limits before creating the chatbot. An authorised editor can change them later from the edit page.
Starting from a template
Picking From a template leaves the long form behind and shows a short one: choose the template, press Create chatbot. You get an independent copy and the template itself is untouched.
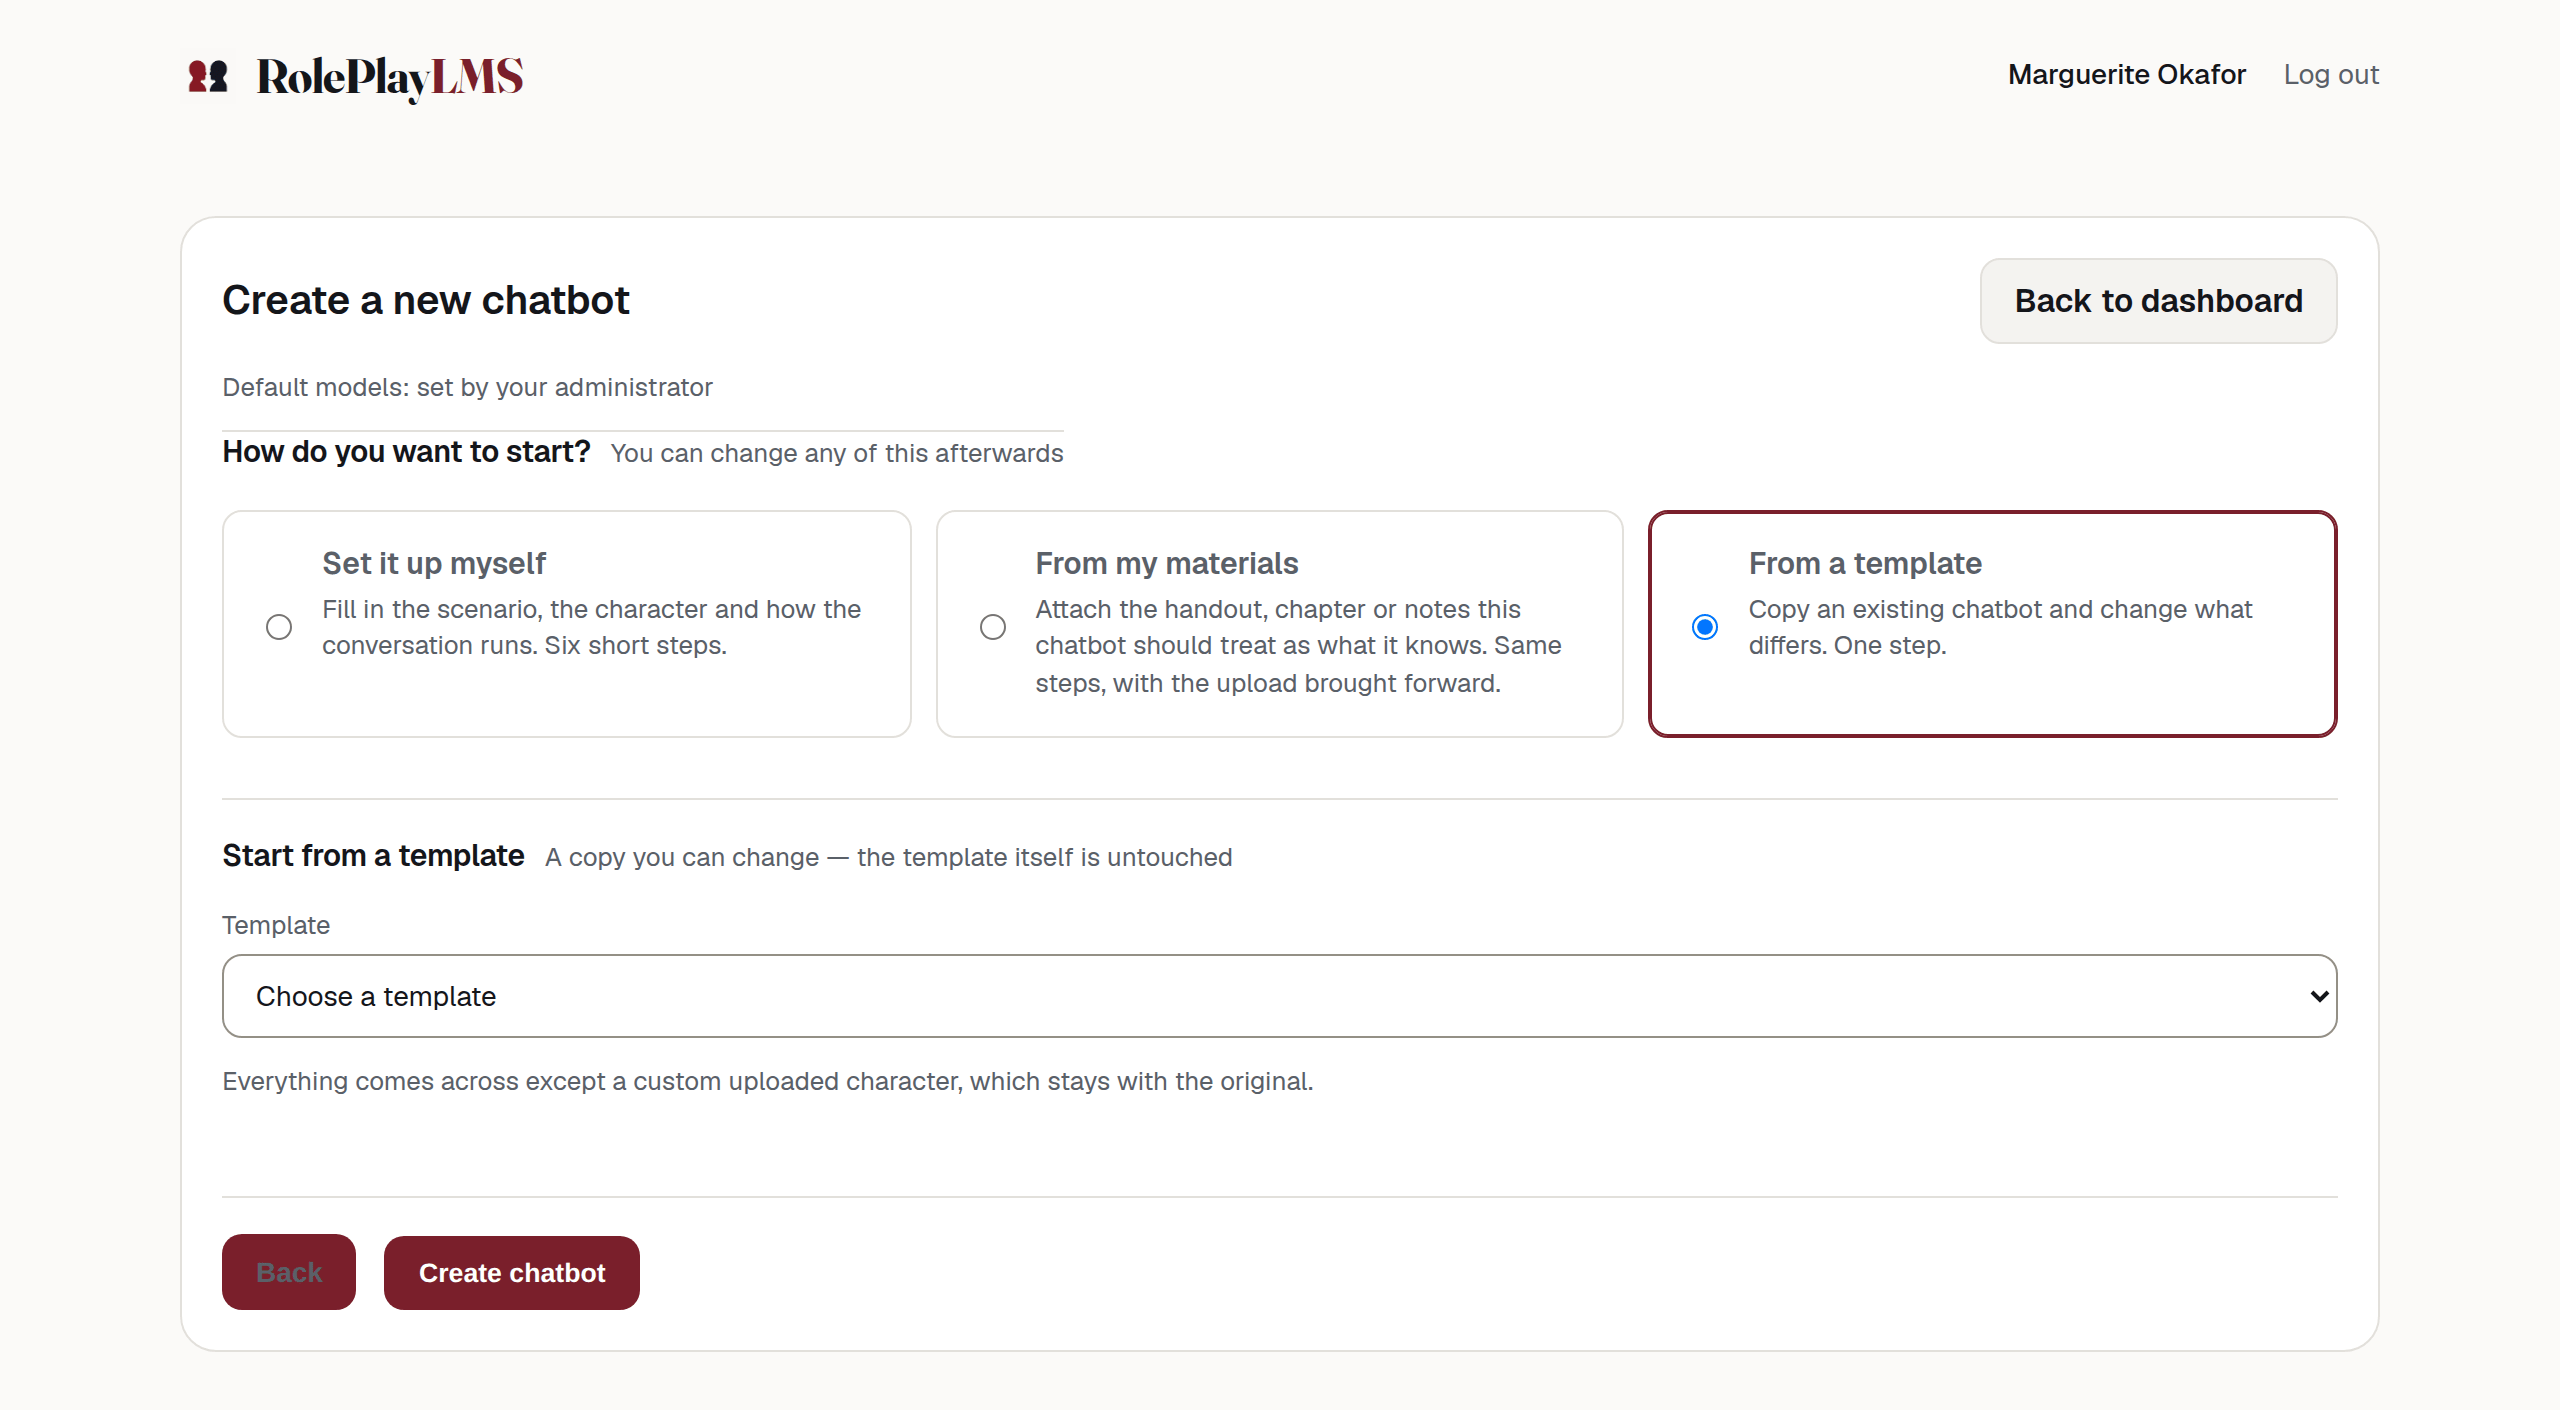
The copy includes prompts, limits, the static image or built-in talking character, and teaching content. A retired custom 3D character is left behind; the copy uses the static image. Copies made here do not inherit the LMS result mode or marking rubric, so check those settings before using the copy for assessment. Templates and copies has the details.
What a standard teacher gets
A standard teacher does not get the wizard. The button on their dashboard reads Create chatbot from template, and it opens a single dropdown of the templates their organisation has published.
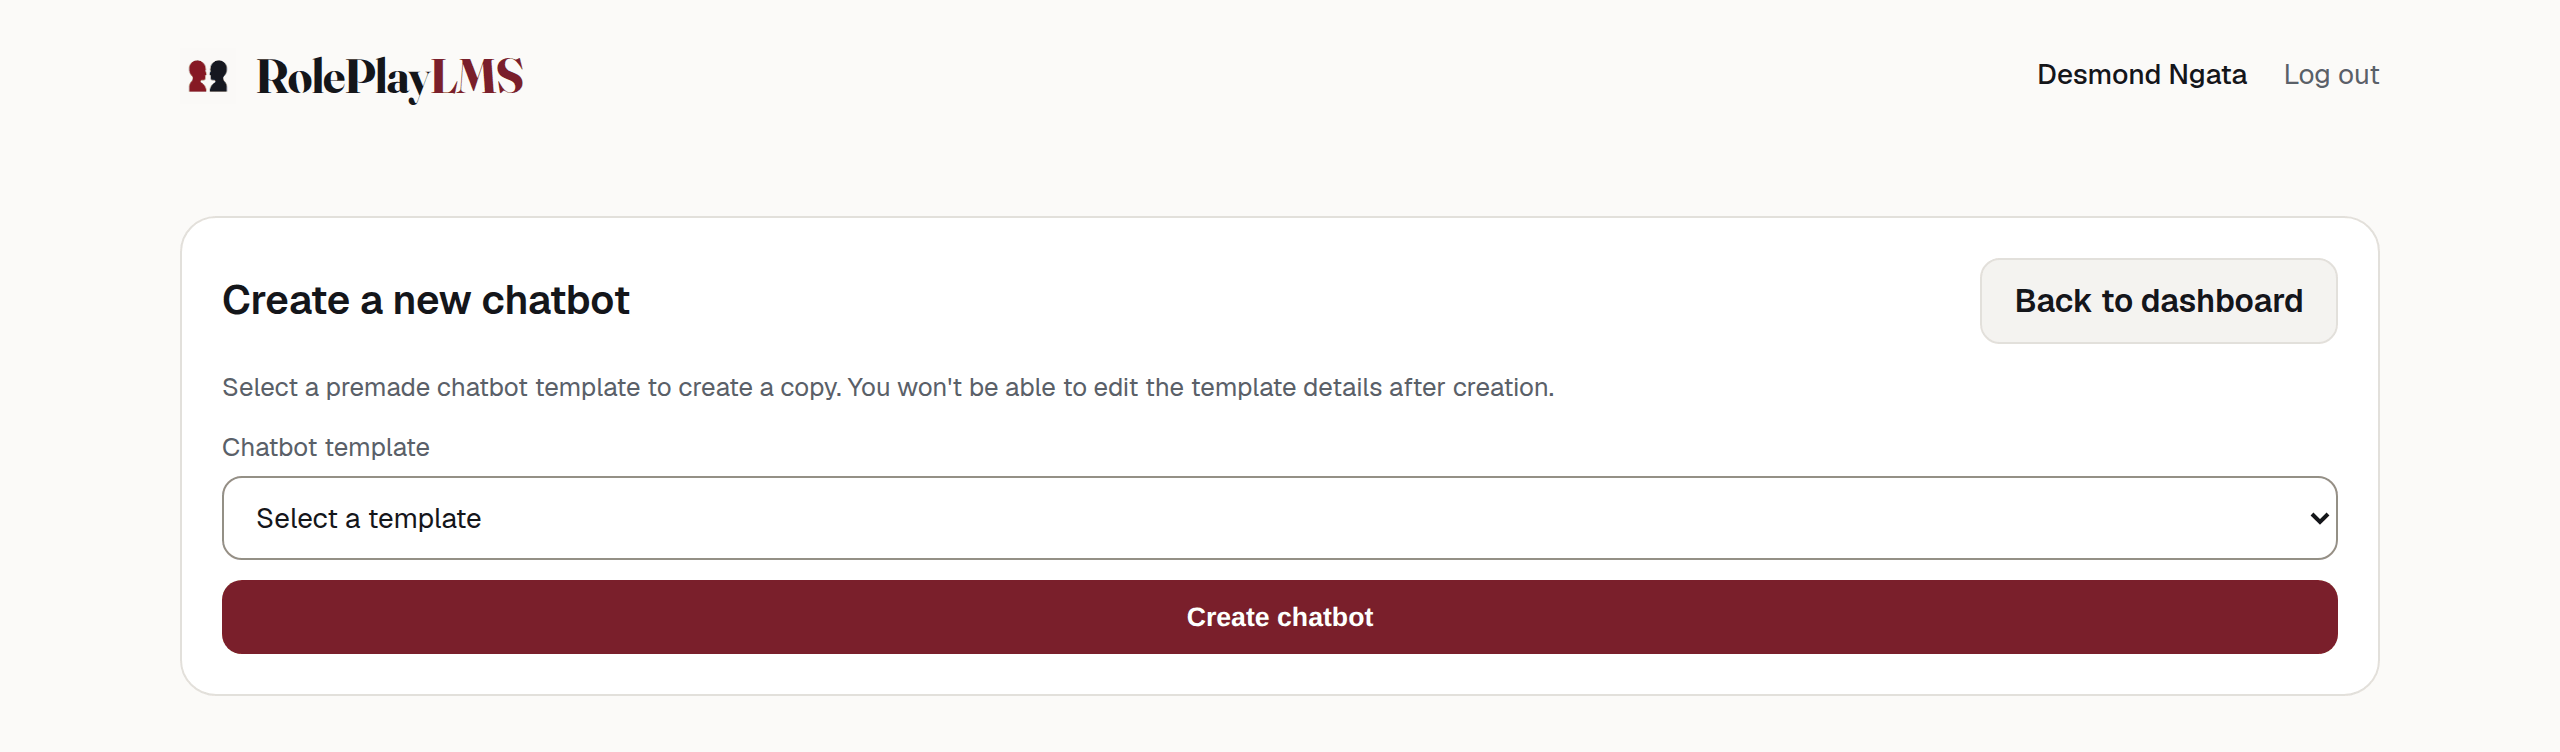
The copy belongs to the teacher and has its own responses. Its prompts, limits, character and teaching content come from the template. A standard teacher can later change only its name and unit code, through Rename. The LMS result mode and rubric are not inherited by this website copy route.
If nothing has been published yet, the page says No chatbot templates are available to you yet. Ask an administrator to create or share one. There is nothing a teacher can do from that screen; somebody with a lead teacher account has to tick Available as a template on a chatbot first.
Note
A personal account starts here, with something to copy
Signing in to a brand-new personal account opens this page rather than an empty dashboard, and the template list is not empty: a few starter scenarios ship with the product. Copy one and change it — the copy is yours, and editing it leaves the original alone. Once you have built something, signing in takes you to the dashboard as usual, and you can always reach it from Back to dashboard.
These starters appear only in a personal account. They are not in any organisation’s template list and not in the LMS content chooser.
You will only see this if you are a teacher whose LMS was registered for authoring
You get the full wizard, inside the LMS, and you can save edits on your own chatbots afterwards. You do not get the Teacher filter or Duplicate, the dashboard pencil still goes to Rename, and teaching content stays with lead teachers and administrators.
When a create is refused
The form is checked when you press Create chatbot. If a required field is missing, the wizard opens again with:
- everything you typed still in place, on the route you chose;
- the message beside the field it is about, not at the top of the page.
The messages name the field and the fix — Enter the unit or subject code this chatbot belongs to, Give the chatbot a title — students see this, Write the first line the chatbot says, since it speaks first. A full list is in Common messages.
Warning
Files chosen on the create form are not kept when a save is refused
Text comes back; an attached document does not. If the wizard rejects your submission, choose the file again before pressing Create chatbot a second time.
Two failures are not about anything you typed:
- Default models or prompts are missing. Ask an admin to set default chat, TTS, STT models and prompt templates. The platform has not been set up. No chatbot can be created until an administrator fixes it.
- Source chatbot not found. The template you picked is no longer available to you — most often it has been unpublished. Go back to the dashboard and start again.
With JavaScript switched off
The steps, the rail and Continue are added in the browser. Without JavaScript you get the same form as one long page, in the same order, with one Create chatbot button at the bottom. Nothing is missing and nothing behaves differently on the server.