Building chatbots
The character
How the chatbot looks and sounds, and how the student talks to it
Use this section to choose the character’s picture, speaking voice and conversation mode. Describe who the character is in the role prompt, one section further on.
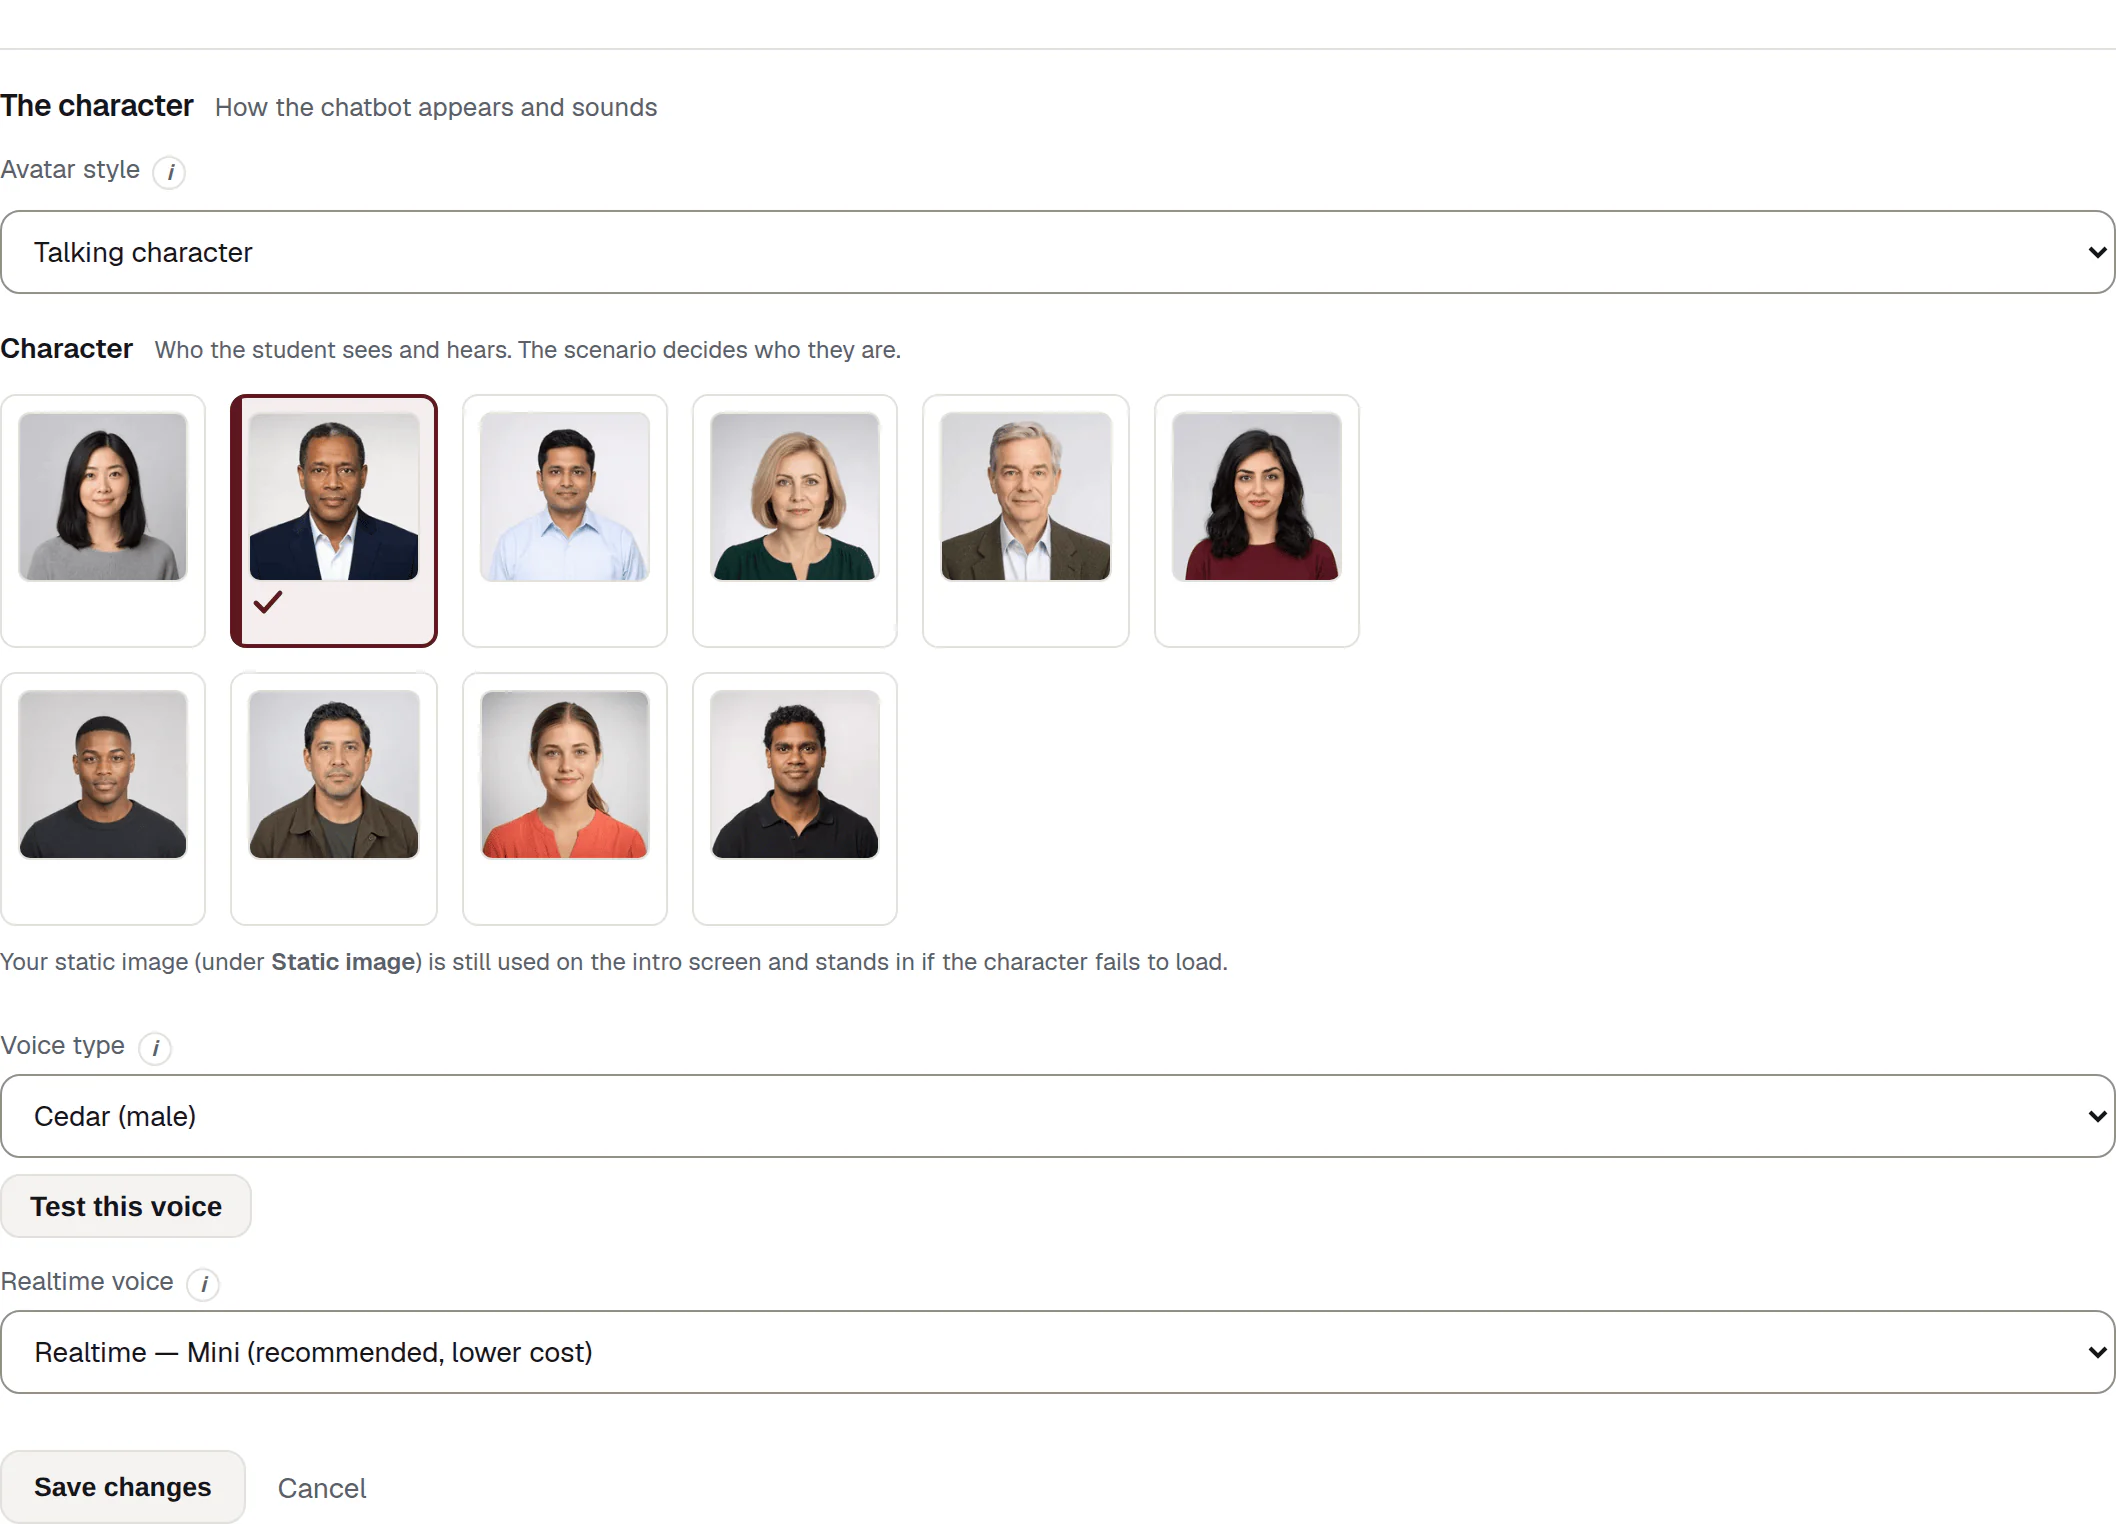
Avatar style
Static image shows a still picture throughout — the lightest option, and fine for written practice.
Talking character shows a portrait that speaks and blinks in time with the reply. Choose the character below.
Choosing Talking character reveals the gallery. Choosing Static image hides it and uses the image you upload or generate.
Note
The two are not exclusive. Your static image is still used on the intro screen even when a talking character is on, and it stands in if the character fails to load. It is worth setting one either way.
Chatbot avatar — upload or generate
Under Static image there are two buttons.
| Control | What it does | Who sees it |
|---|---|---|
| Upload image | Opens your file picker and uploads the image you choose. It appears in the preview underneath, and is used from the next save onwards. | Everyone who can build |
| Generate image | Opens a small dialog with one box — Describe the avatar — and a Generate button. What comes back lands in the same preview. | Everyone who can build |
The description box carries its own example: Friendly nursing patient, soft lighting, watercolor style…. Describe the person and the look; the character’s identity is set in the role prompt.
Things that can go wrong here, and what each one means:
| Message | What to do |
|---|---|
| Unsupported image format. | Save the picture as a JPEG, PNG or WebP file and upload it again. |
| Image is too large (server limit …). | The limit is read off the server and named in the message. Resize the image. |
| Upload did not complete. Please try again. | The transfer was cut short. Try again. |
| No image model configured. | Generation has not been set up for your platform. Ask an administrator, and upload an image in the meantime. |
| Image generation failed. Please try again. | The request did not come back. Try again, or upload an image instead. |
The character gallery
Ten portraits, shown under the heading Character — Who the student sees and hears. The scenario decides who they are.
Choose the face the student will see. The portrait does not set the character’s identity, age or occupation; the role prompt does that.
The chosen card is marked three ways at once — a rule down its left edge, a tick, and the radio button itself — so it never depends on colour alone. Keyboard users move through the gallery with the arrow keys.
Note
Each portrait has a name in its tooltip and screen-reader label so teachers can identify it. Students do not see that name, and it does not define the role.
If the gallery is empty, the screen says No characters are installed. Choose Static image above, or ask an administrator to restore assets/avatars2d/. The directory that message names is out of date — the installed character files live in assets/avatars-real/. Choose Static image and ask an administrator to restore them.
Warning
A character that cannot be found is dropped without a warning
If the portrait a chatbot names is missing when you save, the chatbot is set back to Static image rather than saved with an empty stage. After any save where you changed the character, check the Appearance line on the edit overview says what you expect.
An older chatbot may show an extra card marked 3D — a model imported before the current character set existed. The student view no longer renders these retired models; students see the static image instead. A duplicate or template copy shows the static image as well.
Voice type
The speaking voice used when the character replies. Preview them by starting a test conversation — voices differ noticeably in warmth and pace, which matters when a student is practising a difficult conversation.
Thirteen voices are offered, each labelled (female) or (male) — for example Coral (female), Onyx (male). That grouping is a shortlisting aid and nothing more. These are synthesised voices, so it is a convenience, not a fact about anybody.
A voice is required. Test this voice beside the list opens a dialog where the selected character speaks a fixed phrase in the selected voice, so you can hear it without leaving the form. For how a voice behaves across a whole conversation, use Test chatbot on the dashboard instead.
Realtime voice — live speech
The last control on this section decides how the student talks.
| Control | What it does | Who sees it |
|---|---|---|
| Off (classic push-to-talk) | The default. The student types, or holds a microphone button while they speak and releases it to send. | Everyone who can build |
| Realtime — Mini (recommended, lower cost) | Live speech. The student talks and the character answers without pressing send. | Everyone who can build |
| Realtime — Flagship (best quality) | The same live mode, with more nuance in the reply and a higher cost per minute. | Everyone who can build |
Mini is the recommended lower-cost option. Use Flagship only when the activity needs the more capable model and the extra cost has been approved.
What changes for the student
Turning live voice on changes their screen:
- the hold-to-talk button goes, because the microphone is continuous;
- a Mute button appears next to End conversation;
- the text box stays, reading Type here to answer, or just talk — a student who cannot or would rather not speak is not shut out;
- the countdown runs in the browser, so a time limit is a firm guide rather than a hard cut.
What changes for you
- The Chat model setting on The conversation no longer applies. Live voice uses one model for both understanding and speech.
- Live voice costs more per minute than push-to-talk, on either option. Check with your administrator before enabling it for a large class.
- Ten of the thirteen voices are used live exactly as you chose them. Three — Nova, Onyx and Fable — are not available in live mode and are matched to the nearest voice that is, so a chatbot can sound different with live voice on. If the voice matters, pick one of the other ten.
Warning
A microphone inside an LMS
Some LMS activity frames block the microphone. If students report that live voice never hears them inside your LMS, that is where to look first — see When something goes wrong.